PRE-LOVED ★ RELOVED ★ REPEAT ★ SELL YOUR WARDROBE ★ FIND YOUR NEXT FAVOURITE ★ PRE-LOVED ★ RELOVED ★ REPEAT ★ SELL YOUR WARDROBE ★ FIND YOUR NEXT FAVOURITE ★ PRE-LOVED ★ RELOVED ★ REPEAT ★ SELL YOUR WARDROBE ★ FIND YOUR NEXT FAVOURITE ★ PRE-LOVED ★ RELOVED ★ REPEAT ★ SELL YOUR WARDROBE ★ FIND YOUR NEXT FAVOURITE ★ PRE-LOVED ★ RELOVED ★ REPEAT ★ SELL YOUR WARDROBE ★ FIND YOUR NEXT FAVOURITE ★ PRE-LOVED ★ RELOVED ★ REPEAT ★ SELL YOUR WARDROBE ★ FIND YOUR NEXT FAVOURITE ★
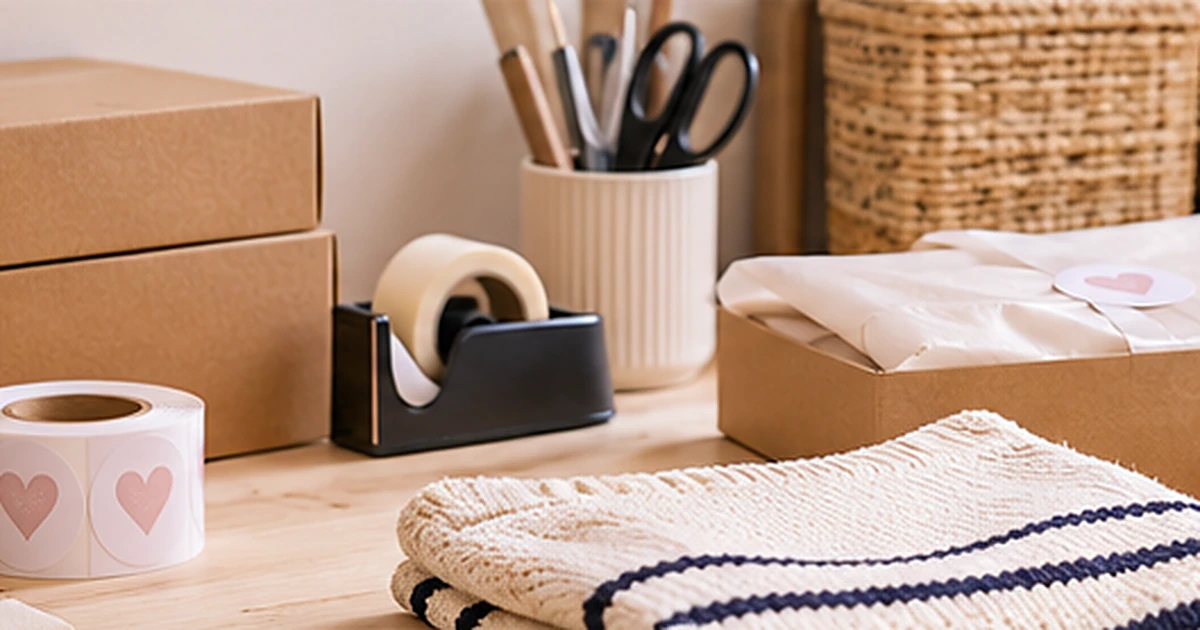
You’ve sold something on Vinted. Lovely!
Someone has fallen in love with that jacket you’ve barely worn, and it’s finally going to a new home.
Now you just need to pack it.
Where’s the tape? Have you got a mailing bag? Is that old Amazon box still in the cupboard? And why does the parcel label always seem to disappear just when you need it?
Before you know it, the kitchen table is covered in clothes, scissors, cardboard boxes and bits of packaging.
Sound familiar?
The good news is that you don’t need a spare room, a dedicated packing desk or a miniature warehouse to get organised.
With a few useful supplies and a simple system, you can create a packing station that works even in a small flat.
And, most importantly, one that can disappear when you’re finished.
1. Start With the Space You’ve Actually Got
Let’s get one thing straight.
A packing station doesn’t need to be a permanent piece of furniture.
It can be a storage box you pull out when an order comes in, a small trolley tucked beside a wardrobe or a shelf in a cupboard.
The important thing is keeping your supplies together. If you’re also organising the garments you’re selling, see our small-space clothing storage guide.
Think about somewhere that’s reasonably easy to access and close to a flat surface where you can fold and pack clothes.
A few possibilities include:
- A lidded storage box kept under the bed.
- A small three-tier trolley that can be moved around.
- One shelf inside a wardrobe or cupboard.
- A compact desk organiser with separate compartments.
- A folding table that comes out only when you’re packing orders.
If you’re selling the occasional item, a single box might be everything you need.
Don’t buy a trolley just because somebody on TikTok has a beautiful colour-coordinated packing station.
Start with what you’ve already got.
You can always upgrade later.
2. The Packing Supplies You Really Need
It’s surprisingly easy to get carried away buying packaging.
Before ordering 200 mailing bags, six rolls of branded tape and a label printer, work out what you’ll actually use.
Here’s a sensible starter kit.
| Essential | Why it’s useful |
|---|---|
| Strong mailing bags or padded mailers | Protecting suitably packed clothing parcels |
| Small cardboard boxes | Shoes, handbags and items needing more protection |
| Tissue or protective wrapping | Keeping garments neat and adding appropriate protection |
| Strong packing tape | Securing parcels properly |
| Scissors | Cutting tape and packaging |
| Tape measure | Checking parcel dimensions |
| Small weighing scales | Checking weight where required |
| Storage box or organiser | Keeping everything together |
You may already have most of these things at home.
One important point: Vinted recommends sturdy outer packaging, such as a suitable padded mailer or cardboard box, rather than using an unpadded bag on its own.
Choose packaging that protects the actual item and meets your carrier’s requirements.
The aim isn’t to create a beautiful parcel at any cost.
It’s to make sure your buyer receives exactly what they purchased, in the condition they expected.
3. Set Up Four Simple Packing Zones
Even if your entire packing station fits inside one storage box, it helps to think about the order in which you’ll do things.
You don’t need four separate areas. Just four stages.
Zone One: Check
This is where you retrieve the item you’ve sold and give it a final inspection.
Check that you’ve selected the correct garment, size and colour.
Have another look for marks, damage or anything that might have been missed when you listed it.
If an item has developed a problem since being advertised, resolve it with the buyer before sending it.
Zone Two: Wrap
Fold the garment neatly and add suitable protective wrapping.
For a simple top or dress, this might be tissue paper combined with appropriate protective outer packaging.
More delicate items may need additional protection.
Zone Three: Seal and Label
Choose the right packaging, secure it properly and prepare the postage label or digital shipping code.
Check the parcel’s weight and dimensions against the selected shipping service.
Zone Four: Ready to Send
Keep finished parcels together in a designated spot, away from the clothes you’re still selling.
A small basket or box works well.
That way, when you’re heading out, you can collect everything that’s ready without accidentally picking up the wrong parcel.
Four stages. One small space. Considerably less chaos.
4. Choose the Right Packaging for Different Clothes
Not every item needs the same packaging.
A cotton T-shirt and a structured leather handbag have very different requirements.
T-Shirts, Tops and Everyday Clothing
Fold the garment neatly and protect it from moisture, dirt and rubbing.
Choose a sturdy, appropriately padded mailer or suitable box, depending on the item and the delivery service.
Avoid oversized packaging that allows the garment to move around unnecessarily.
Dresses, Knitwear and Delicate Fabrics
Delicate clothing deserves a little more attention.
Check for snagging risks, protect embellishments and avoid crushing items that could lose their shape.
A layer of clean tissue can help with presentation, but remember that tissue alone doesn’t replace suitable protective packaging.
Shoes and Boots
Shoes generally need more structure than soft clothing.
A sturdy cardboard box with suitable cushioning is usually a sensible choice.
Protect buckles, heels and decorative details, and prevent the shoes from rubbing against one another.
If you’re using the original shoe box, it’s often better to protect it inside suitable outer packaging rather than simply attaching a label to it.
Handbags and Accessories
Protect straps, fastenings and metal hardware.
Use appropriate wrapping and a box that provides sufficient room for cushioning without allowing the item to move around.
For valuable pieces, check the carrier’s restrictions and compensation limits before sending.
Whatever you’re packing, follow the requirements of Vinted and the selected delivery provider.
5. Reuse Packaging Without Making It Look Like a Disaster
One of the nicest things about second-hand selling is giving things another life.
That can include packaging.
If you’ve received a delivery in a perfectly good cardboard box, there’s no reason it can’t be considered for reuse.
The same applies to suitable protective materials that are clean and still in good condition.
But there are a few rules worth following.
- Remove or completely cover old shipping labels and barcodes.
- Make sure the packaging is clean, dry and strong enough.
- Avoid boxes that are crushed, torn or weakened.
- Don’t use packaging with misleading hazard markings.
- Check that the reused materials provide adequate protection.
A sturdy reused box is much better than a brand-new one that isn’t suitable for the contents.
You also don’t need expensive branded packaging to make a parcel feel presentable.
Clean, neat and secure will do nicely.
6. Do You Actually Need a Label Printer?
Here’s where you can potentially save yourself some money.
If you’re selling occasionally through Vinted, you may not need to own a printer at all.
Depending on the delivery service selected by the buyer, Vinted can provide either a printable postage label or a digital code.
With eligible digital-label services, you can take your parcel to a suitable drop-off location and have the label printed there, or follow the service’s instructions for label-free posting.
Always check the specific instructions for your order, because the available options vary by carrier.
When does a printer become worthwhile?
If you’re regularly selling a larger number of items, printing postage labels at home can be convenient.
A standard household printer may be perfectly adequate.
If you’re processing a steady stream of parcels, a dedicated thermal label printer might eventually make sense.
Thermal printers generally don’t need ink cartridges, and compatible models can produce adhesive shipping labels.
But there’s no point buying one before you know whether you’ll use it enough to justify the expense.
For occasional sellers, a digital shipping label could be all you need.
7. Keep Your Packaging Organised, Not Just Stored
Having supplies in one place is helpful.
Being able to find the right thing immediately is even better.
If you’re using a storage box, try dividing it into sections.
You might keep:
- Mailing bags and flat packaging together.
- Boxes stored flat where possible.
- Tissue and other protective materials in a clean compartment.
- Scissors, tape and measuring tools in a small organiser.
- Labels and paperwork in a folder or pouch.
You don’t need special storage products for every category.
Small boxes, containers and drawer organisers you already own can work perfectly well.
And try not to mix packaging supplies with clothes that haven’t yet been photographed or listed.
It’s surprisingly easy for everything to become one enormous pile again.
8. Keep an Eye on Parcel Size and Weight
Before sealing your parcel, check that it’s suitable for the delivery service being used.
Vinted provides shipping options based on parcel dimensions and weight.
The exact limits depend on the carrier and service.
A lightweight blouse and a bulky winter coat may need different parcel sizes, even if both technically fit inside a mailing bag.
Always allow for the final packaging when checking dimensions and weight.
A simple tape measure and suitable weighing scales can be useful.
If you already have kitchen scales that can safely and accurately weigh your parcels within their capacity, you may not need to buy anything else.
Remember, the size of the finished parcel matters, not just the item inside it.
And don’t forget to check the shipping information before the buyer purchases, because certain shipping details cannot be changed once the order has been placed.
9. Make Postage Day a Little Easier
Here’s a habit worth developing.
Instead of constantly packing and posting one parcel at a time, try establishing a routine that suits your schedule.
You might check your sales each evening, pack orders together and plan a convenient trip to your drop-off location.
For sellers with several orders, batching similar tasks saves time.
For example:
- Collect all the sold items.
- Match each item to the correct order.
- Inspect and fold everything.
- Prepare the appropriate packaging.
- Pack and seal each order individually.
- Apply or prepare the correct labels.
- Check that every parcel is ready for its designated carrier.
Just take care not to mix up labels.
You really don’t want the person expecting a size 12 Mango dress to receive somebody else’s walking boots.
Don’t miss your shipping deadline
Vinted generally requires sellers to dispatch orders within five business days, although approved extensions may be available.
Always check the deadline shown for your individual transaction.
It’s also worth checking where your nearest suitable drop-off points are and when they’re open.
A parcel that’s beautifully packed but still sitting in your hallway after the deadline isn’t much use to anybody.
10. Take a Quick Photograph Before Sending
This is a small habit that could save you some trouble later.
Before sealing a parcel, take a photograph showing the condition of the item and how you’ve protected it.
You can also photograph the finished parcel.
Vinted recommends retaining packing photographs in case there’s a problem during delivery.
Keep the images privately, and avoid sharing photographs that reveal somebody else’s name or address.
It’s also sensible to retain your proof of postage or drop-off confirmation.
Once the order is complete and any relevant dispute period has passed, you can review what records you still need to keep.
You don’t need an elaborate filing system.
Just somewhere sensible to find the information if something goes wrong.
11. What About Thank-You Cards and Pretty Packaging?
It’s lovely to receive a parcel that’s been packed with care.
But there is a difference between thoughtful presentation and unnecessary expense.
You don’t need branded tissue, elaborate stickers, ribbons and a handwritten card for every £7 top.
A clean, neatly folded garment in suitable protective packaging is already a good start.
If you enjoy adding a little personal touch, a small thank-you note can be a nice gesture.
Just remember that extra materials cost money, take up storage space and eventually need disposing of.
Keep things simple and consider whether each addition genuinely improves the buyer’s experience.
You can make a parcel feel special without turning it into a gift hamper.
12. Build Your Packing Station in Stages
Rather than buying everything at once, we’d suggest three levels of setup.
The Occasional Seller
Perfect if you’re selling a handful of things from your wardrobe.
Your setup:
- One storage box.
- A few suitable mailers or reused boxes.
- Protective wrapping.
- Tape and scissors.
- A tape measure.
- Your smartphone for digital postage codes.
That’s plenty to get started.
The Regular Seller
If you’re selling every week, a little additional organisation might save time.
Consider adding:
- A wider selection of packaging sizes.
- Dedicated parcel scales.
- A compact trolley or drawer organiser.
- A simple stock-reference system.
- A small area for parcels awaiting dispatch.
The Serious Reseller
If you’re managing a growing number of orders, you might benefit from:
- A dedicated packing surface.
- A thermal label printer.
- Better inventory storage.
- Labelled supply containers.
- A more structured dispatch routine.
But even at this stage, the most expensive equipment isn’t necessarily the most useful.
Buy things that solve an actual problem.
Not things that just look impressive in photographs.
Your Vinted Packing Station Checklist
Ready to get organised? Here’s a quick checklist.
- Choose a small, convenient space for packing supplies.
- Gather suitable mailers, boxes and protective wrapping.
- Keep tape, scissors and a measuring tool together.
- Store packaging materials somewhere clean and dry.
- Check the item carefully before packing.
- Select packaging that meets the carrier’s requirements.
- Check the parcel dimensions and weight.
- Use the correct shipping label or digital code.
- Photograph the packed item where useful.
- Keep parcels awaiting dispatch separate from unsold stock.
- Send each parcel before its deadline.
- Keep your postage confirmation.
Once you’ve found a system that works, packing orders becomes much less of a chore.
Small Space, Big Difference
There is something rather satisfying about selling something you no longer wear.
You’ve made a little room in your wardrobe, earned some money and helped somebody find a piece they’ll enjoy.
The packing and postage shouldn’t take the shine off that experience.
You don’t need a spare bedroom full of equipment or a perfectly coordinated packing station.
A few useful supplies, a little organisation and a routine you can repeat are more than enough.
And if you’re beginning to feel that photographing, listing, packing and posting clothes is taking over your life?
Well, there’s always another option.
At a Repeat Chic event, you can bring your lovely pre-loved pieces along, let shoppers discover them in person and hand them directly to their next owners.
No postage labels required.
Explore our Seller Setup guides for more practical selling advice, or visit Shop the Setup for ideas on useful equipment.
Pre-loved. Reloved. Repeat.