PRE-LOVED ★ RELOVED ★ REPEAT ★ SELL YOUR WARDROBE ★ FIND YOUR NEXT FAVOURITE ★ PRE-LOVED ★ RELOVED ★ REPEAT ★ SELL YOUR WARDROBE ★ FIND YOUR NEXT FAVOURITE ★ PRE-LOVED ★ RELOVED ★ REPEAT ★ SELL YOUR WARDROBE ★ FIND YOUR NEXT FAVOURITE ★ PRE-LOVED ★ RELOVED ★ REPEAT ★ SELL YOUR WARDROBE ★ FIND YOUR NEXT FAVOURITE ★ PRE-LOVED ★ RELOVED ★ REPEAT ★ SELL YOUR WARDROBE ★ FIND YOUR NEXT FAVOURITE ★ PRE-LOVED ★ RELOVED ★ REPEAT ★ SELL YOUR WARDROBE ★ FIND YOUR NEXT FAVOURITE ★
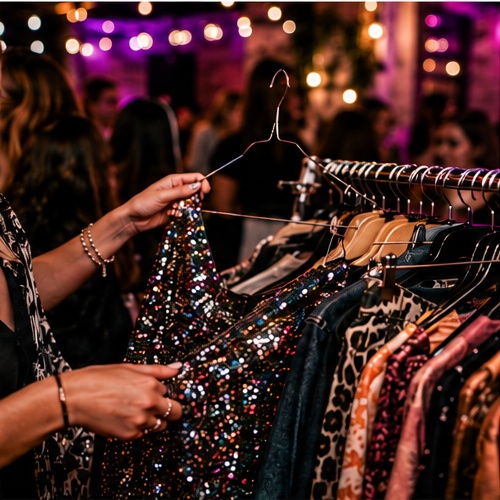
A clothing rail can look brilliant with surprisingly little effort. The biggest mistake is treating it like storage. At an event, the rail is part of the display — and shoppers need to be able to see, browse and understand it quickly.
1. Put Less on the Rail
Overfilling is the fastest way to make good clothes look like hard work. If every hanger is jammed against the next one, shoppers cannot properly see colours, shapes or fabrics.
Leave enough room to slide several hangers apart with one hand. Keep extra stock underneath the table, in labelled boxes or behind the rail and replenish during the event.
Repeat Chic rule
If someone has to wrestle the rail to see the clothes, there are too many clothes on it.
2. Group Clothes in a Way People Understand
You do not need to colour-code your rail like a luxury boutique. You do need a system.
- By size works well when you have lots of mixed styles.
- By garment type works well for smaller rails: dresses, tops, knitwear and jackets.
- By colour can look great when the styles and sizes are already easy to identify.
For most pre-loved sellers, I would start with size, then group similar garments within each size.
3. Make Sizes Obvious
People are much more likely to browse a rail when they can instantly see where their size starts. Size dividers, hanging tags or simple signs can do the job.
Do not make shoppers inspect every individual garment label unless they want to. That turns browsing into admin.
4. Use Matching Hangers Where You Can
Matching hangers make even a mixed pre-loved rail look calmer and more intentional. They also make it easier to control spacing.
They do not need to be expensive. The useful priorities are:
- consistent shape
- enough grip for slippery garments
- not excessively bulky
- strong enough for heavier pieces
5. Put Your Best Pieces Where Eyes Land First
The ends of the rail and the centre are prime positions. Use them for pieces that catch the eye: a strong colour, great print, interesting jacket or something that represents the quality of the rest of your stock.
Do not hide your best item behind twelve black tops because you happened to hang those first.
6. Give Prices a System
Shoppers often hesitate when they cannot tell what something costs. You can price individually, use coloured tags for price bands, or create simple signs such as:
- Everything on this rail £10
- Jackets from £15
- Two for £20
The system matters more than the design. Keep it clear enough to understand from a couple of steps away.
7. Keep a Mirror Nearby
A mirror turns “I quite like that” into “actually, that looks great on me”. If the venue does not provide good mirrors, a portable full-length mirror can be one of the most useful pieces of seller kit you bring.
8. Steam the Hero Pieces
You do not need to steam every garment at the venue. Prioritise pieces that crease badly and anything you want to feature prominently.
A wrinkled dress hanging next to a smooth one will usually look cheaper, even when they are similar quality.
9. Keep the Floor Around the Rail Clear
Bags, coats, boxes and personal belongings around the base of the rail make the whole setup look cluttered and make it harder for people to get close enough to browse.
Keep backup stock contained and personal items out of sight wherever the venue setup allows.
10. Re-merchandise During the Day
Your rail will not stay looking the way it did at opening time. Hangers will move, gaps will appear and popular sections will get messy.
Every so often:
- face hangers the same way
- close awkward gaps
- move a fresh hero piece forward
- put clothes back into the right size section
- remove empty hangers
The Simple Rail Formula
Space + clear sizing + consistent hangers + obvious pricing + one or two standout pieces.
That is enough to make a huge difference without turning your selling space into a visual-merchandising project.
What I Would Buy First
- A sturdy rail
- Matching slim hangers
- Size dividers
- Clear price signs or tags
- A portable mirror
- A compact garment steamer
We’ll add specific tested recommendations as the Repeat Chic display guides grow. Some future product links may be affiliate links, which means Repeat Chic may earn a commission if you buy through them at no extra cost to you.
Next: Build the Rest of the Display
Next we’ll look at mirrors, signage, lighting and simple product-photo setups that help clothes look better without needing a full shop fit-out.